Conventional Ultrasonic Testing (UT) uses a probe comprised of a piezoelectric element capable of generating high-frequency acoustic waves that travel at a specific velocity dependent on the material. The UT instrument produces an A-Scan that visually represents the ultrasonic signal travelling through the component. Analysis of this A-scan display allows for the evaluation and interpretation of the specimen under examination.
UT is primarily used for Thickness Measurement, Weld Inspection, Ball Stud Testing, and Lamination and Corrosion Detection. It is a cost-effective, fast inspection technique that can determine the acceptance or rejection of a test object based on a reference code or standard.
ARI was featured in the Evident InSight Blog as using best practice to conduct Ultrasonic Thickness measurements using their instrumentation.
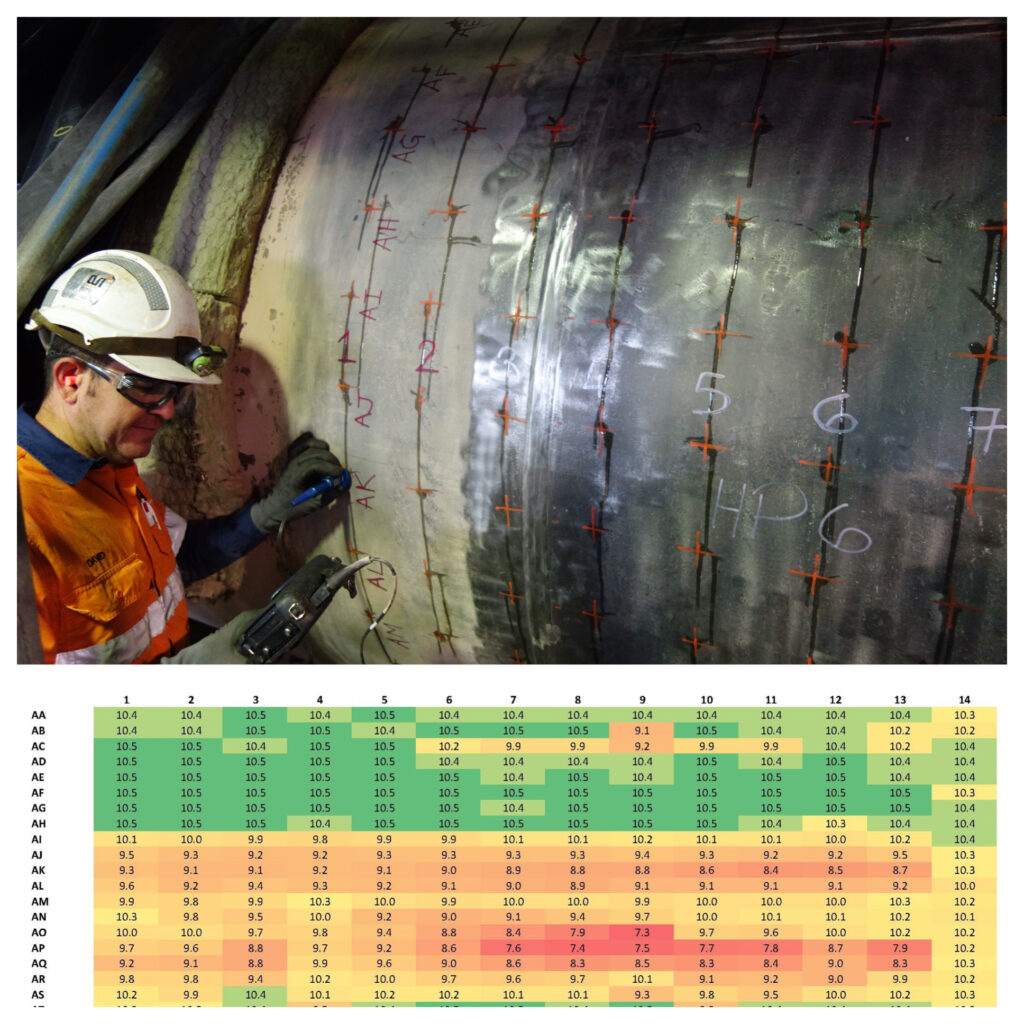
Image: Grid scanning technique for measuring wall thickness using UT (from Evident InSight Blog)
High Sensitivity: Ultrasonic testing can detect extremely small flaws or defects in materials, making it ideal for early detection of potential problems.
Depth of Penetration: Ultrasonic waves can penetrate materials deeply, allowing for the inspection of thick sections and complex geometries.
Accurate Sizing of Defects: This method can provide accurate measurements of the size, shape, and orientation of detected flaws.
Non-Hazardous: Unlike radiography, ultrasonic testing does not use ionizing radiation, making it safer for operators and the environment.
Instant Results: The results are immediate, which is beneficial for quick decision-making in industrial processes.
Portability: Modern ultrasonic NDT equipment is often portable and can be used in a variety of field conditions.
Versatility: It can be applied to a wide range of materials, including metals, plastics, composites, and ceramics.
Minimal Preparation: The test piece usually requires minimal surface preparation compared to other NDT methods.
Skill-Dependent: It requires a high level of skill and experience to interpret the results accurately.
Surface Access Required: Access to both sides of the sample may be necessary, which can be a limitation in some applications.
Couplant Needed: Most ultrasonic techniques require a couplant to facilitate the transmission of sound waves, which can be messy or impractical in some situations.
Limited on Certain Materials: Materials that are highly porous or have coarse grain structures (like cast iron) can scatter the sound waves, making it difficult to get accurate readings.
Difficulty with Complex Geometries: Components with complex shapes or surfaces can pose challenges in terms of probe placement and interpretation of results.
Contact us sending a message or give us a call to discover how we can help.
ARI delivers professional services in pressure equipment inspection, weld inspection, and non destructive testing.
Asset Reliability Inspections © 2024. All Rights Reserved.